
250901 - Case Study; One Playground
Retouching in Photoshop is an important part of a photographers workflow. I happen to like editing, so although being time-consuming, I welcome the challenge if there’s something that’s out of place. I get immense satisfaction when comparing the original to the final photo. Sometimes I learn a new method in the process.
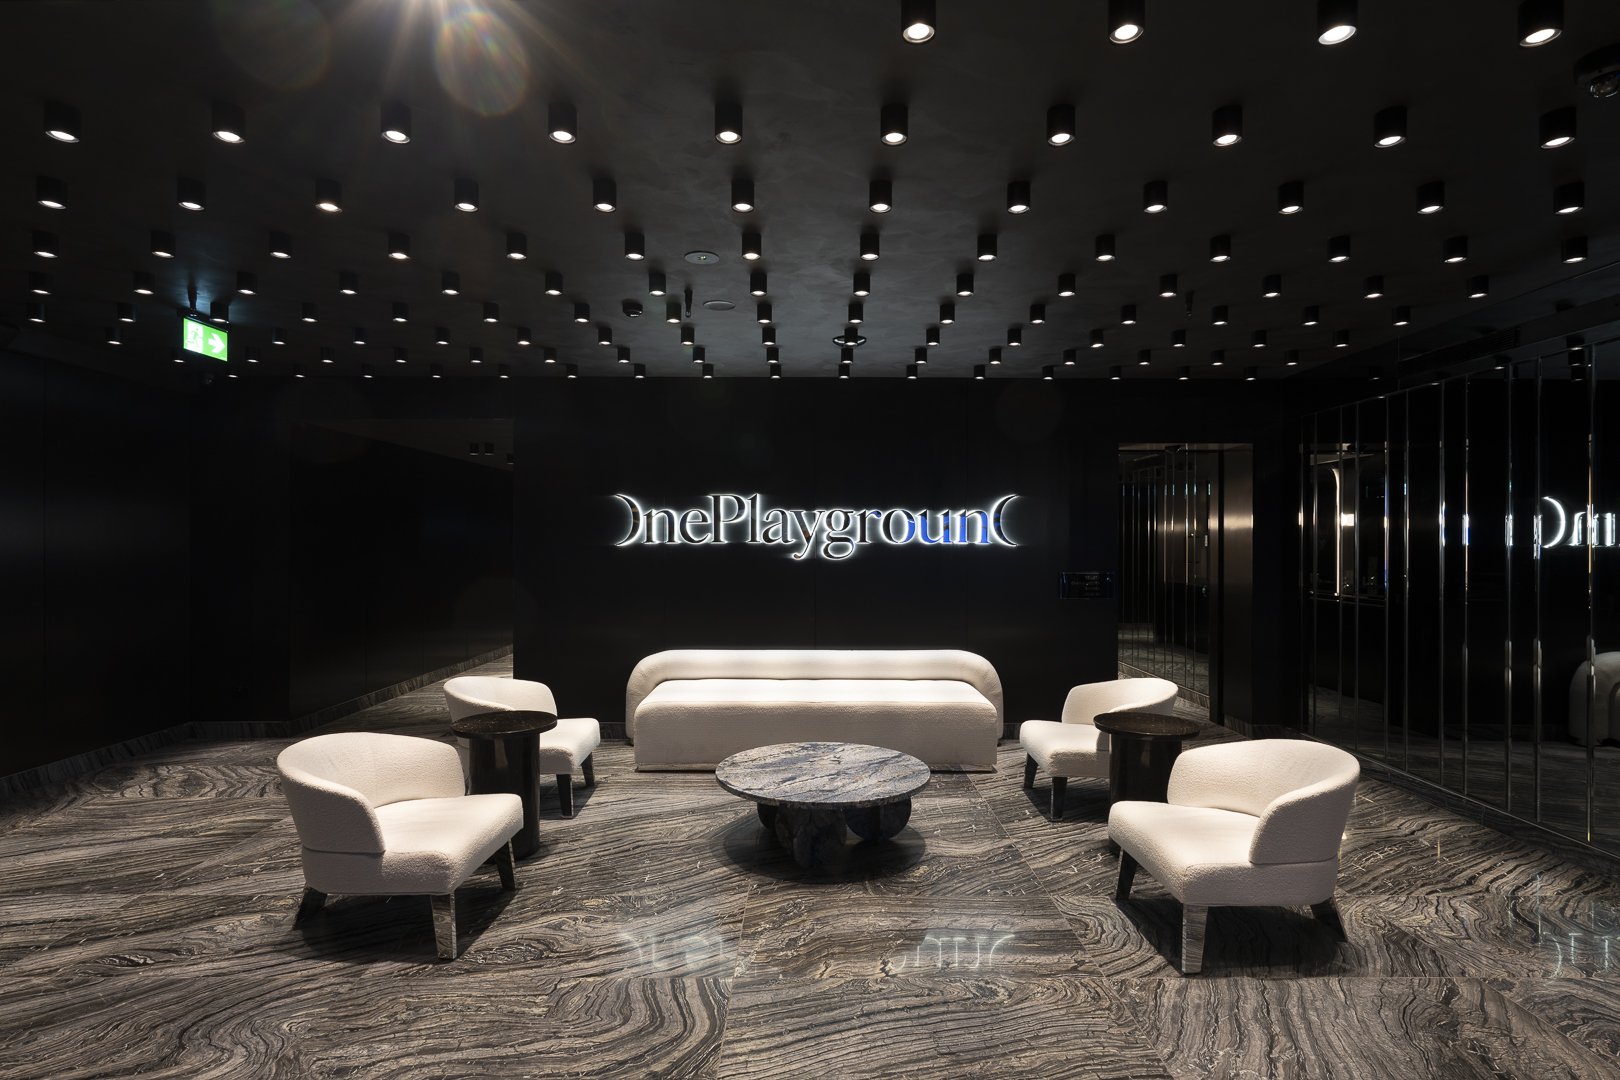
Here’s a few steps I went through to edit this photo of One Playground, Haymarket.
RAW photo
Lightroom colour graded photo
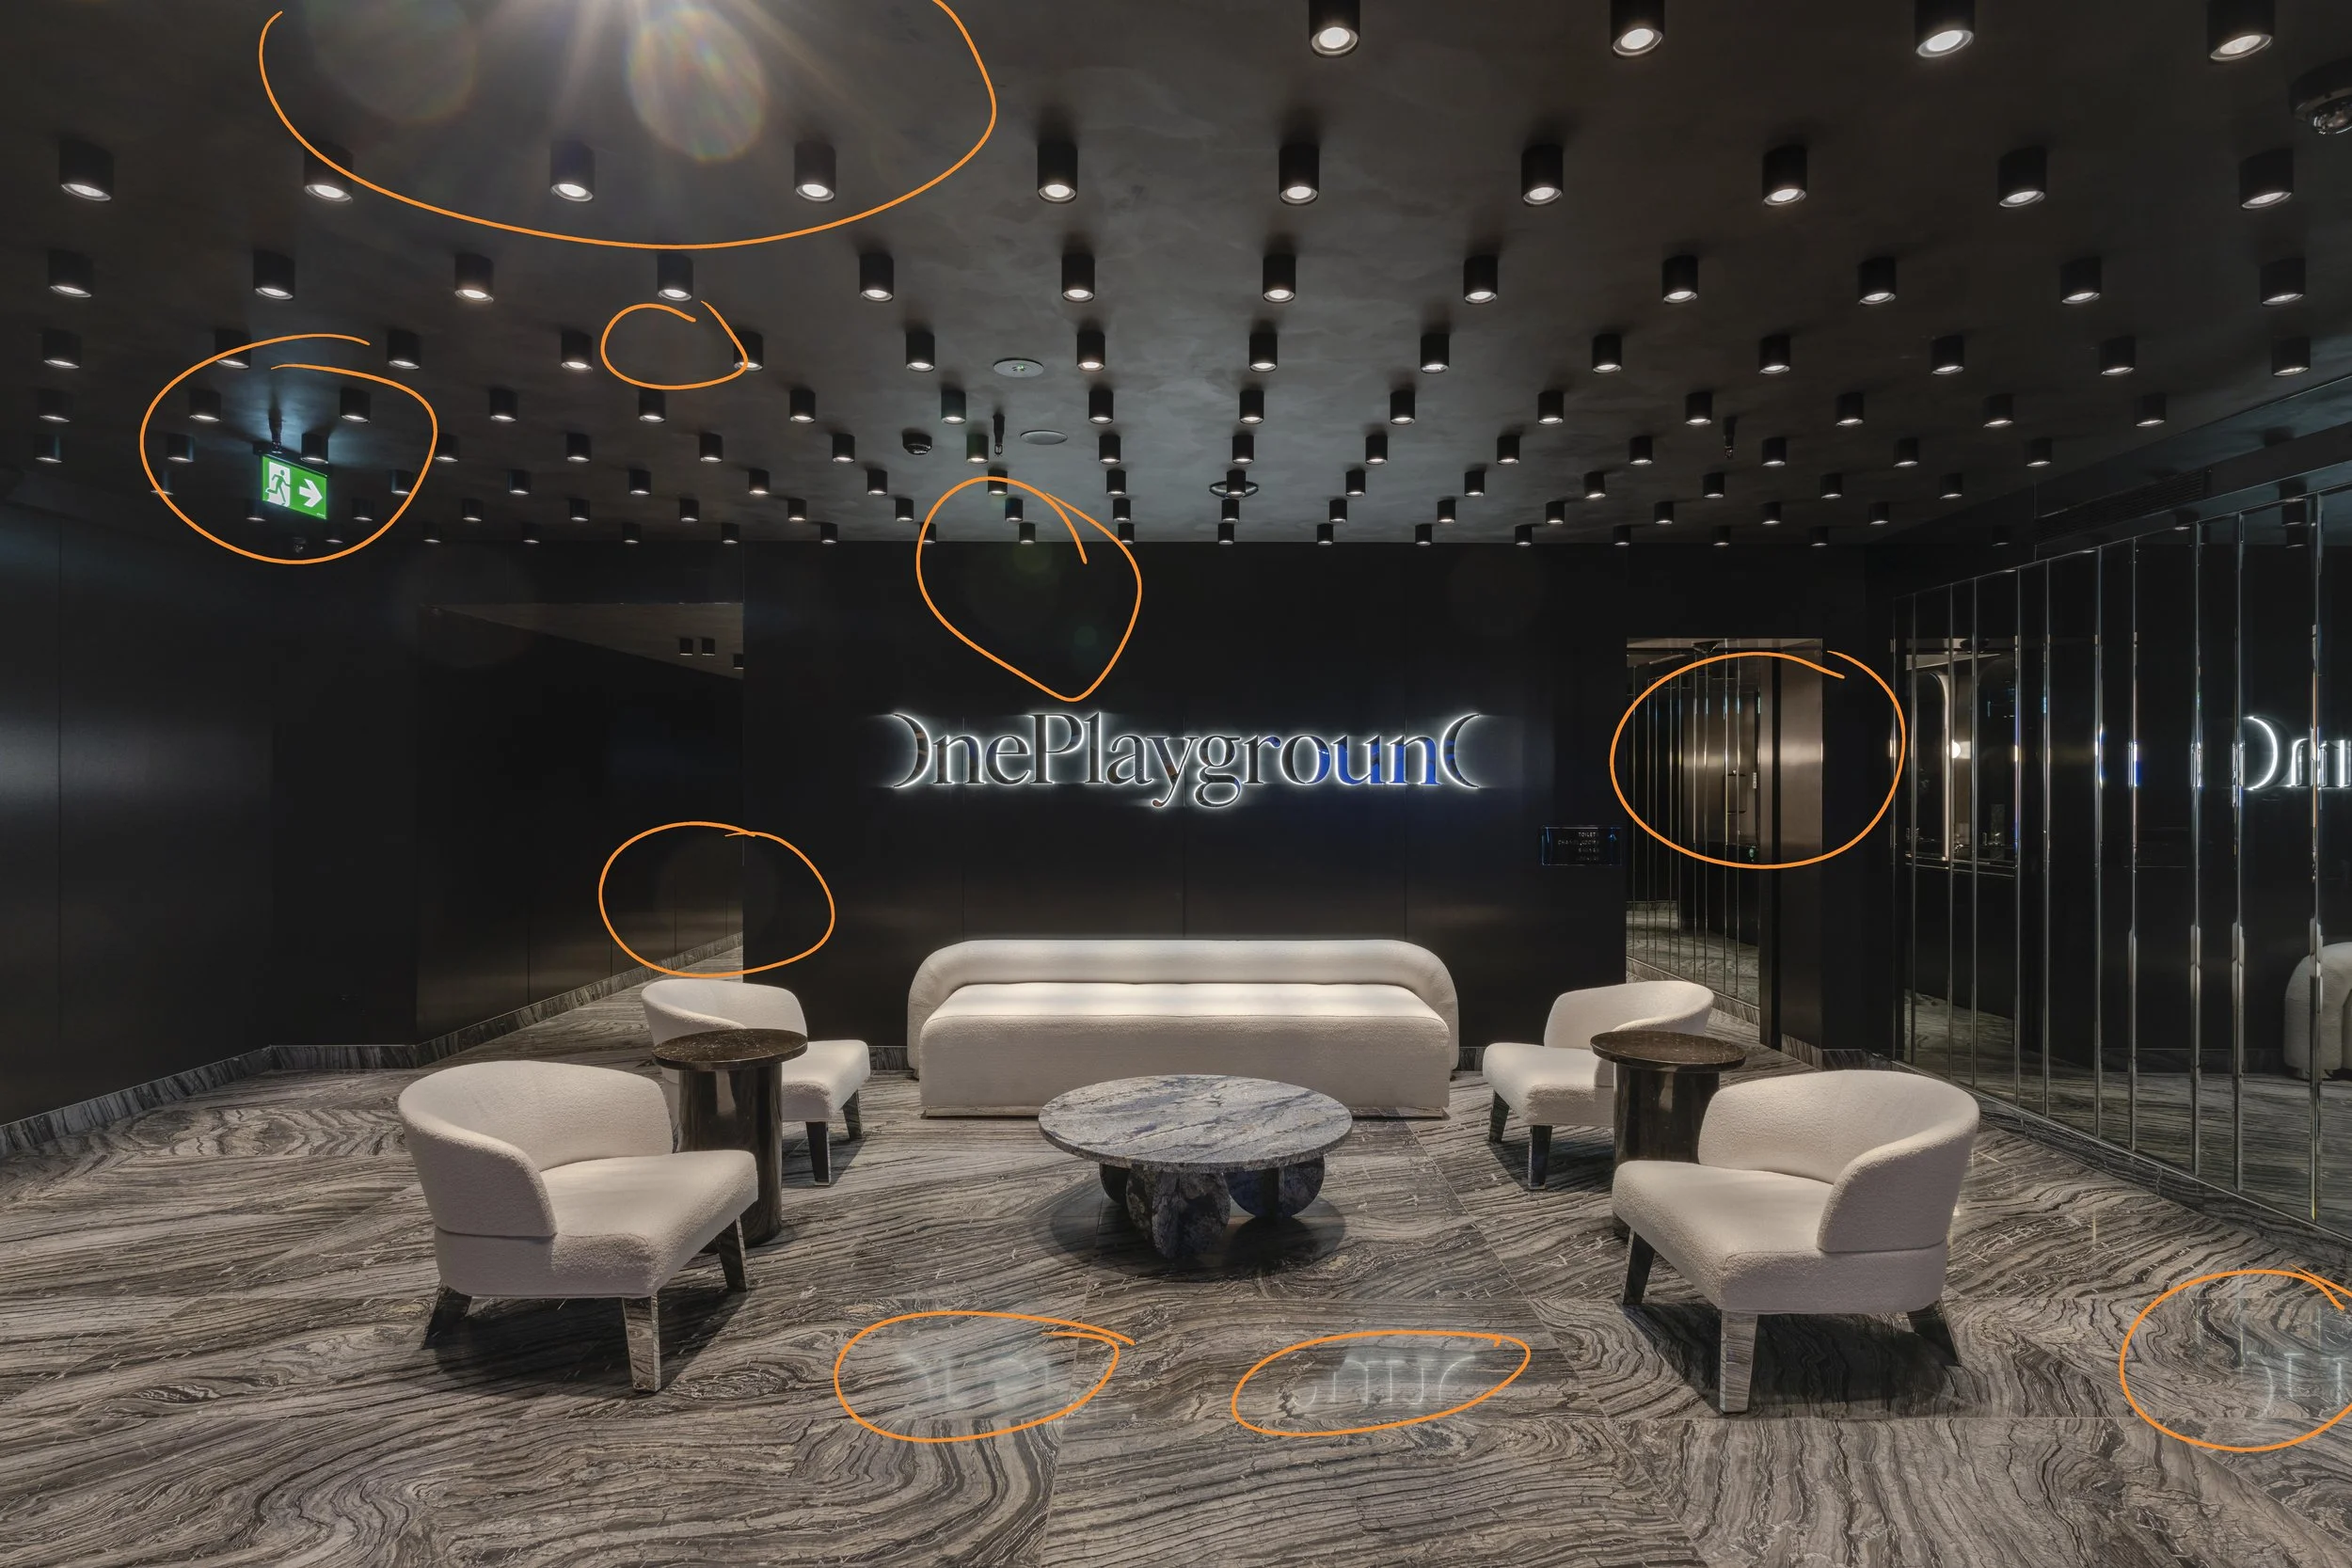
First retouch. Focus on the low hanging fruit: reflections, light leaks etc.
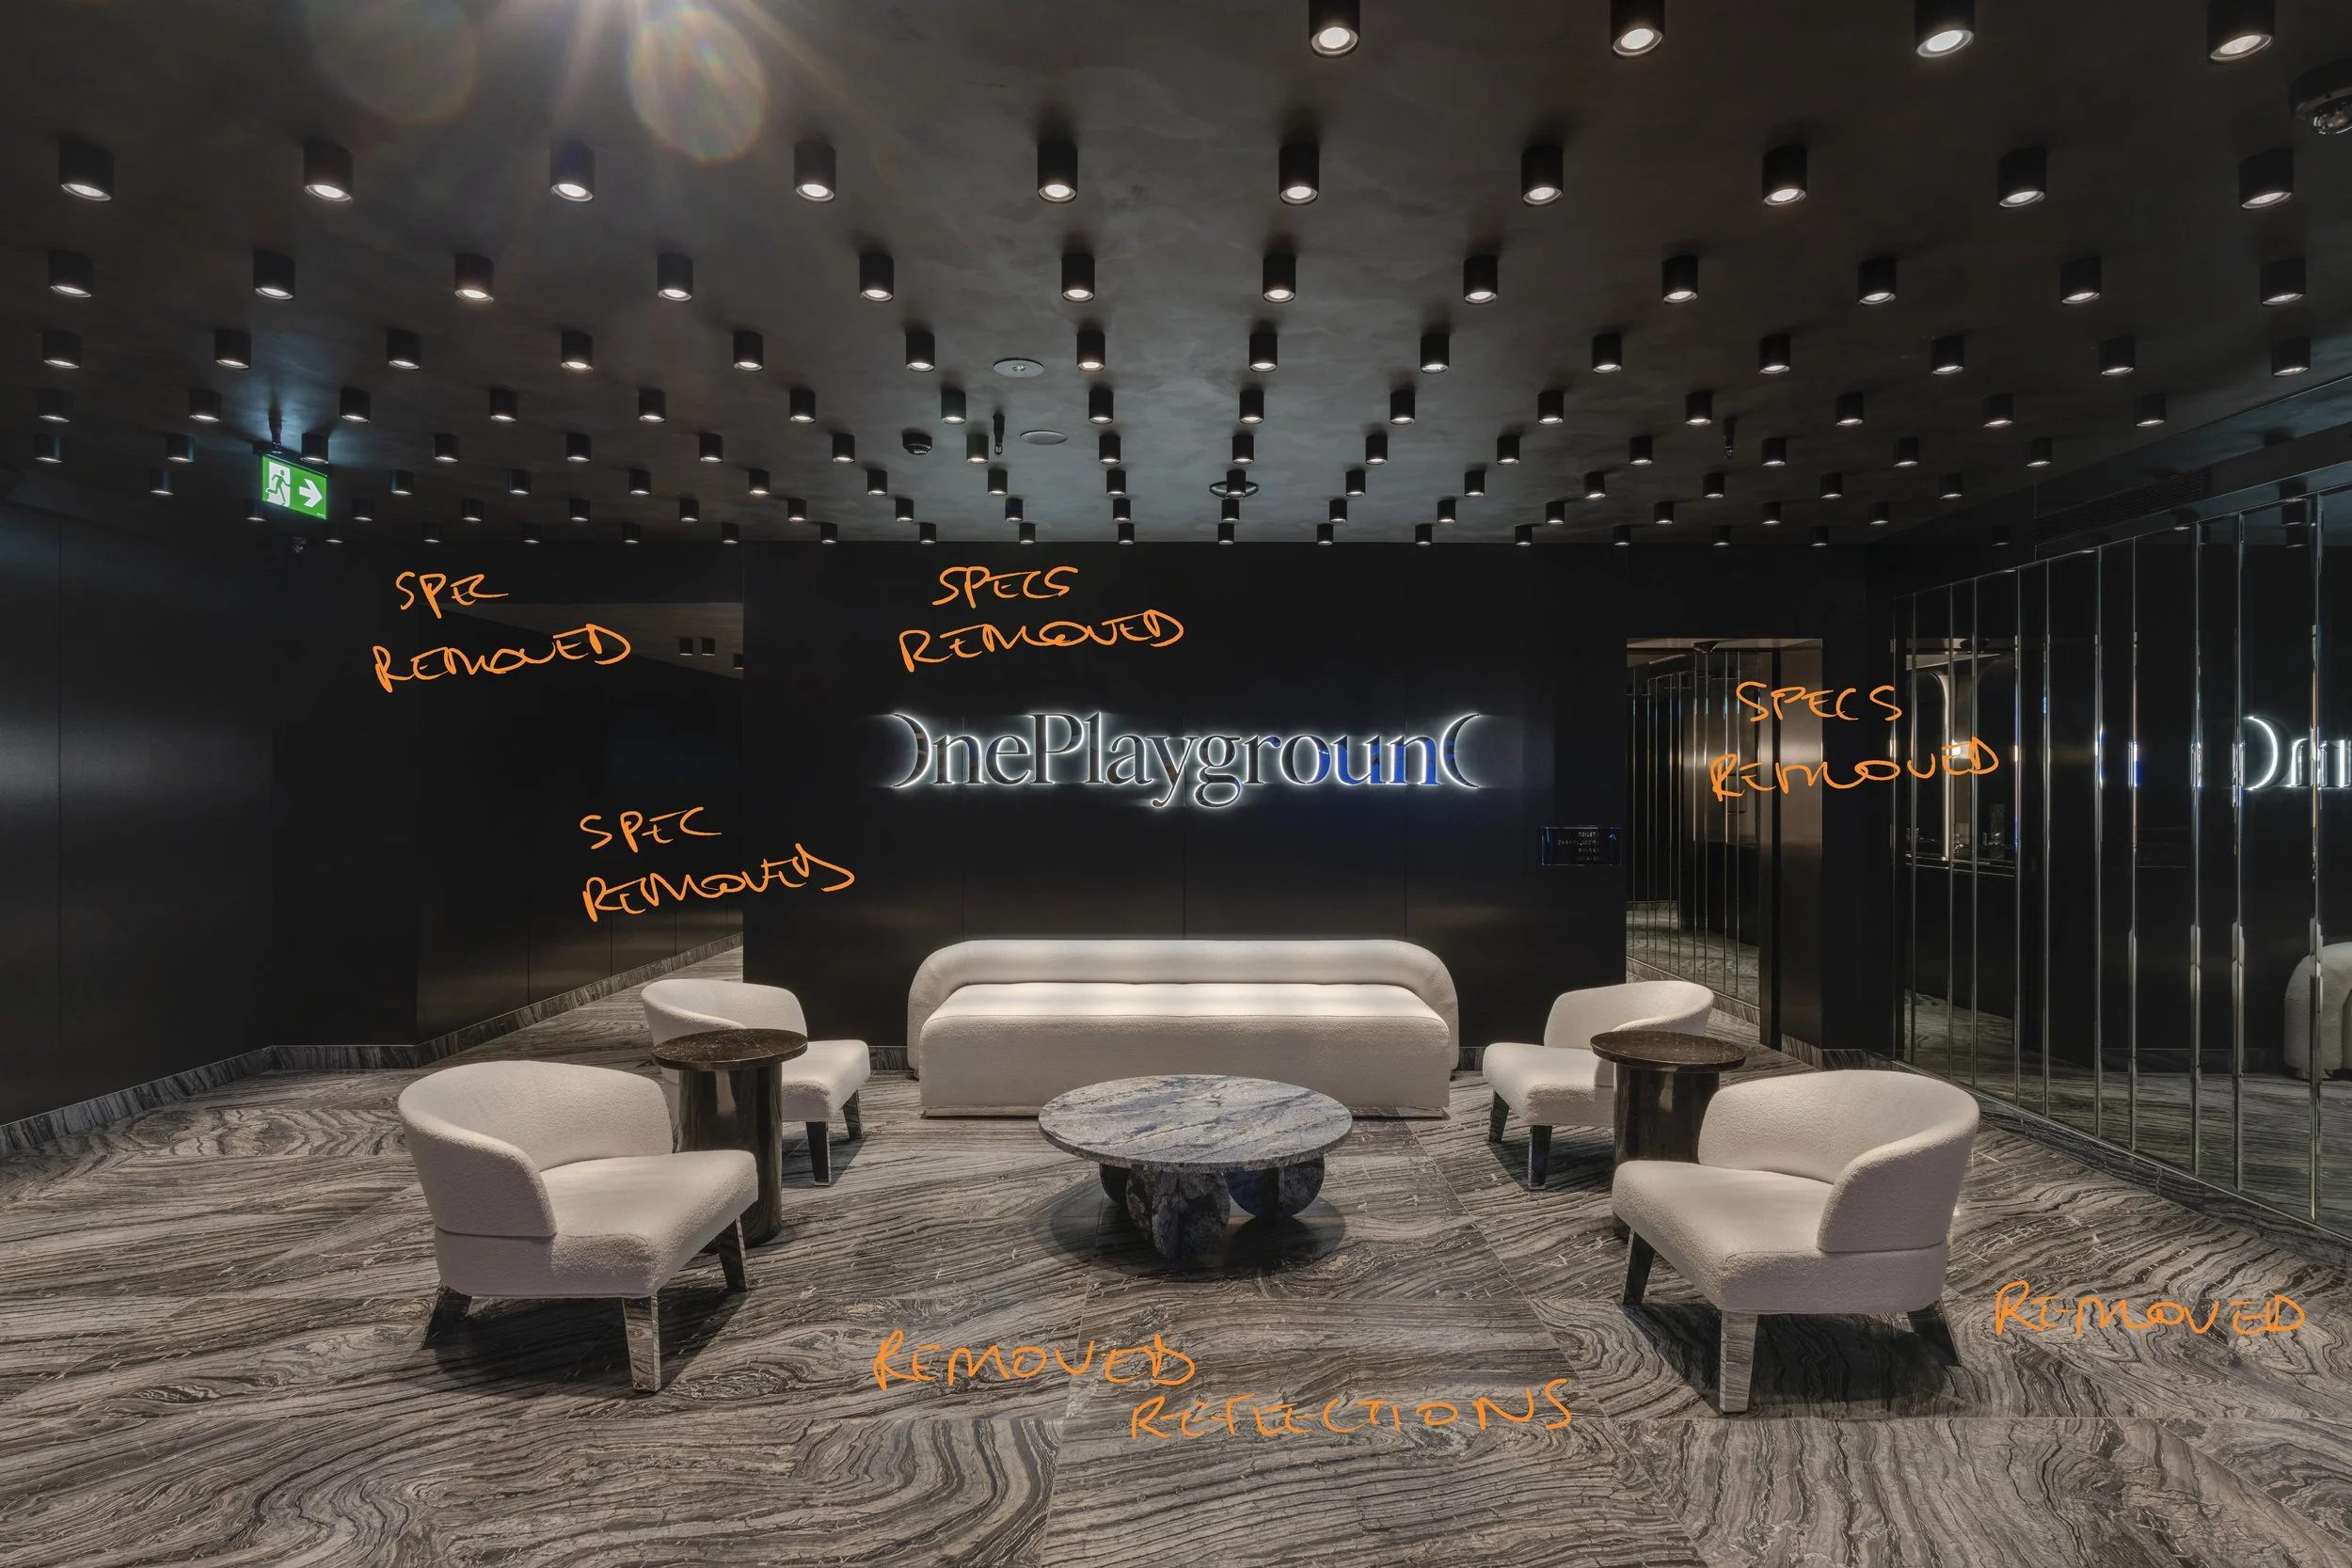
Specs and reflections removed where appropriate
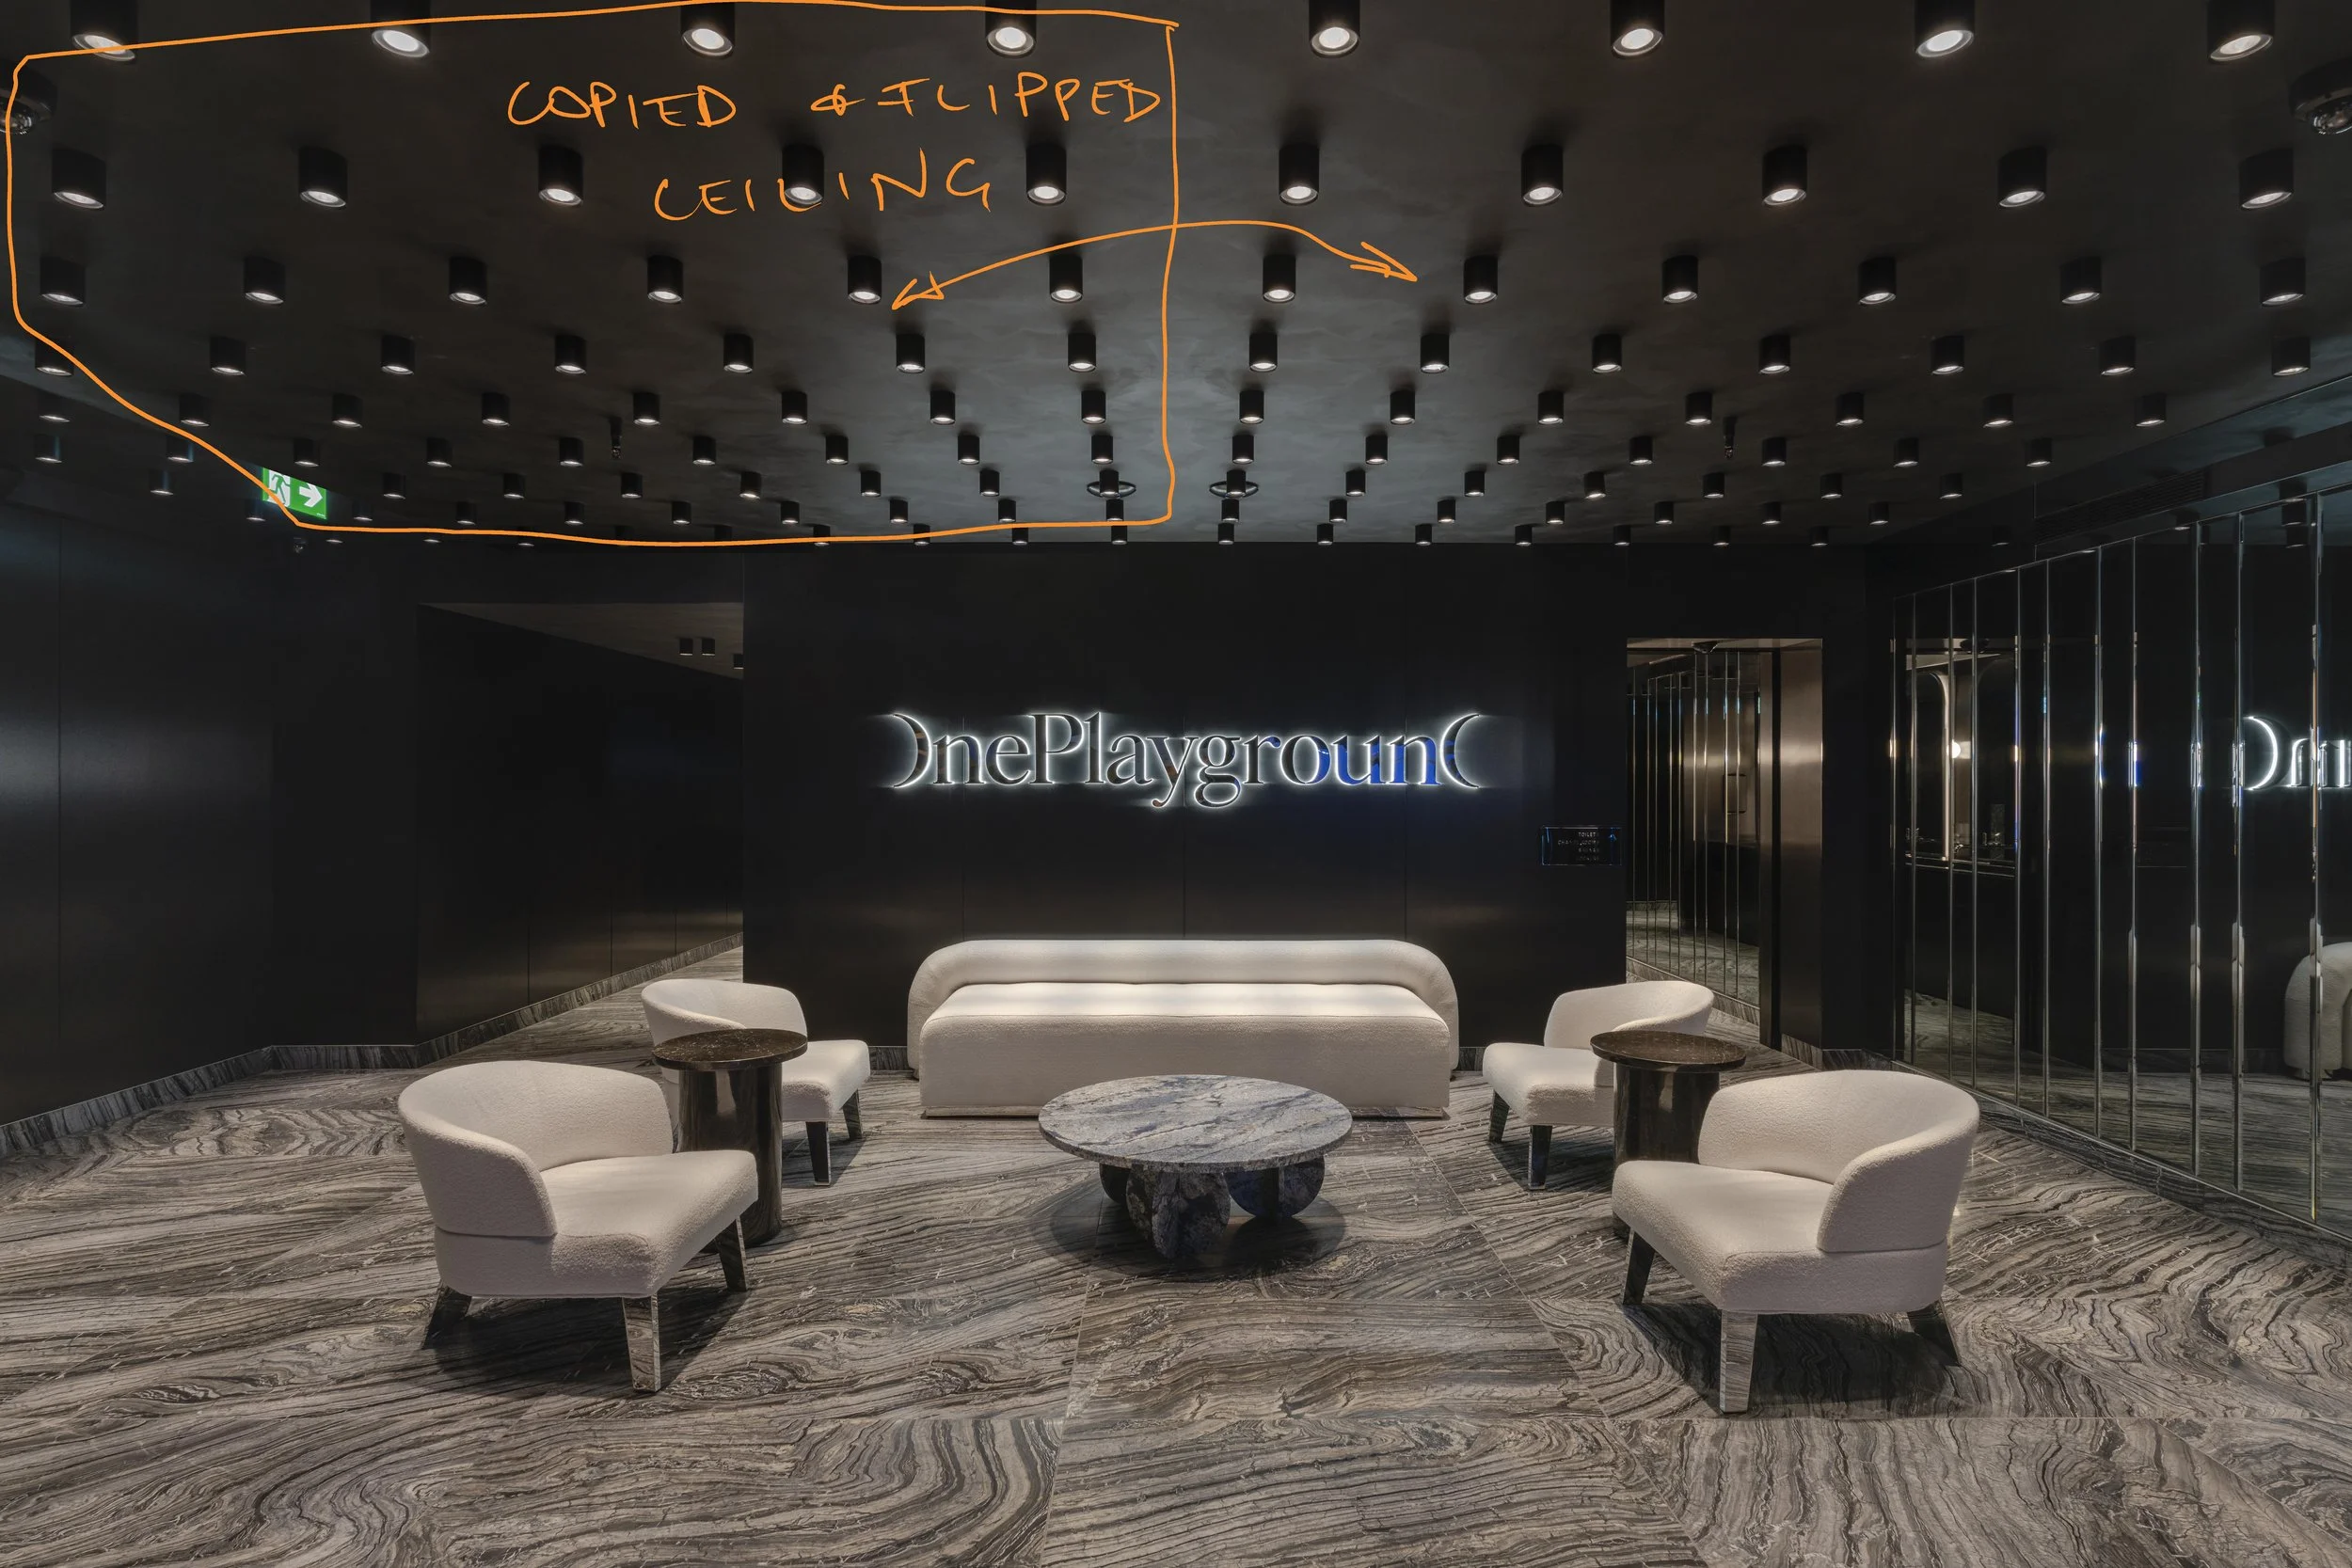
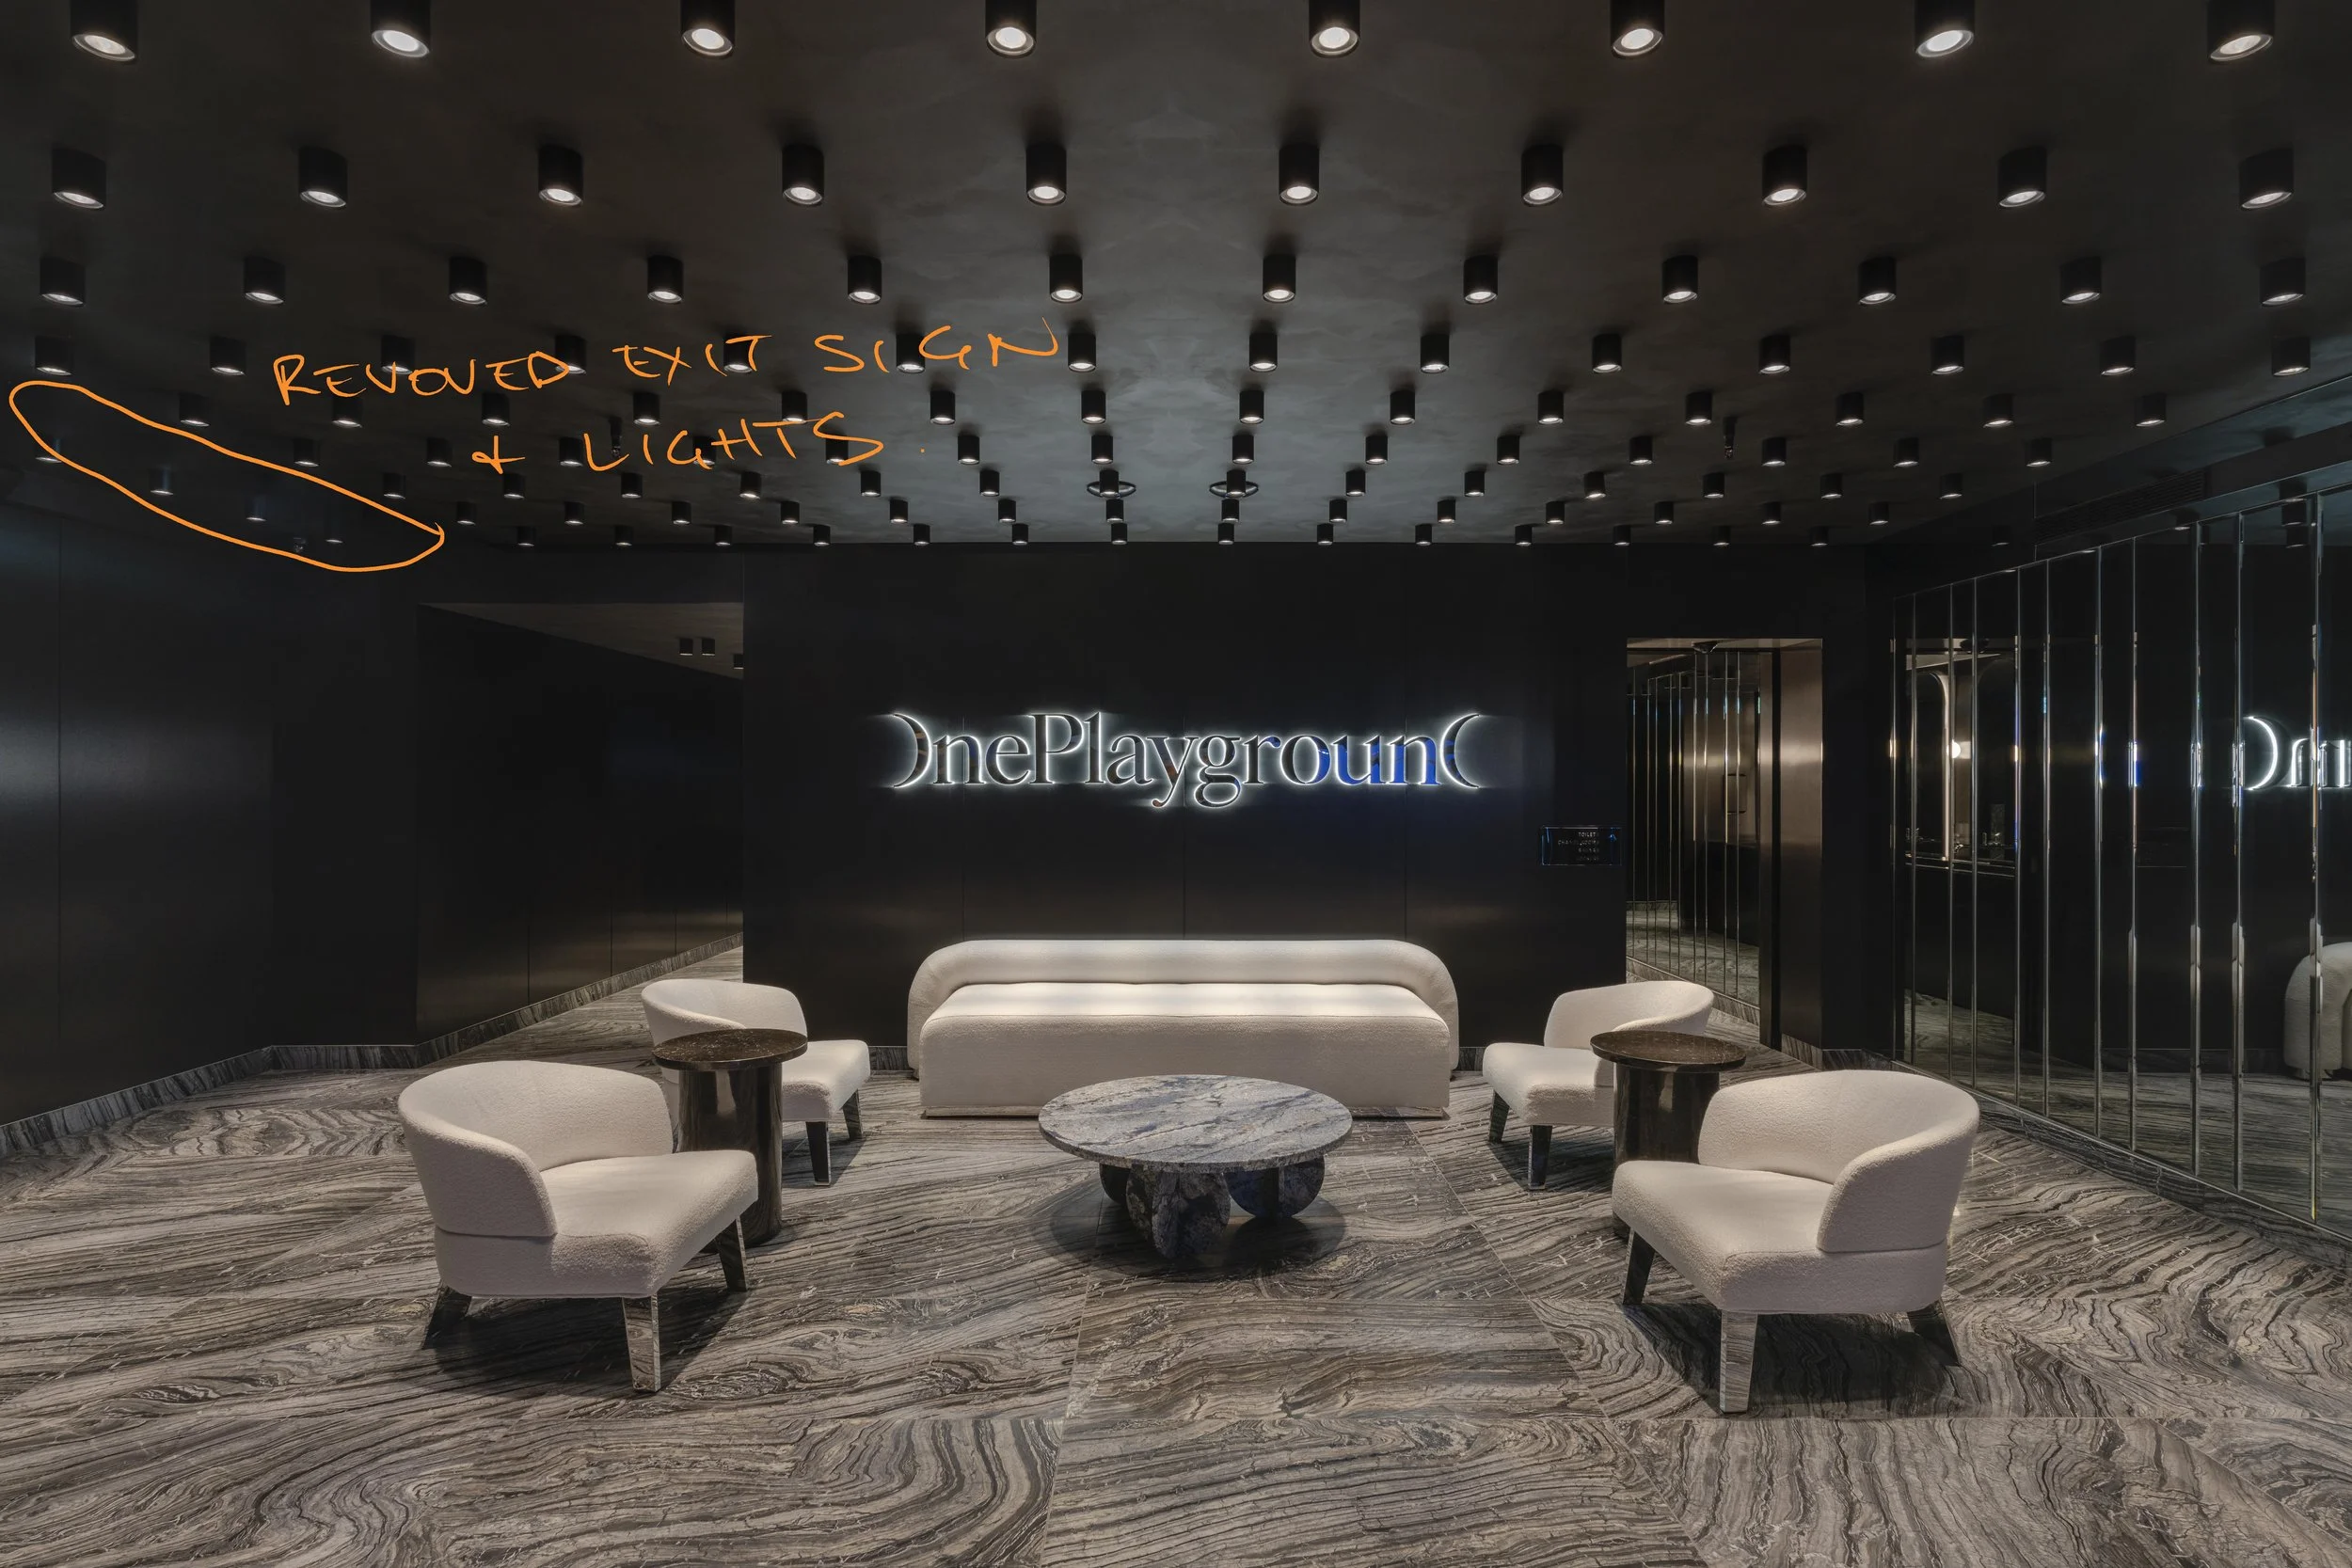
Copy and flip the ceiling. The primary reason for this was to remove the green colour cast and the Exit sign (client request). The additional benefit was that the symmetry of the ceiling can be guaranteed.
Remove Exit signs and lights
Remove distracting ceiling elements
Final photo.


Comparison of the RAW photo versus the final photo:

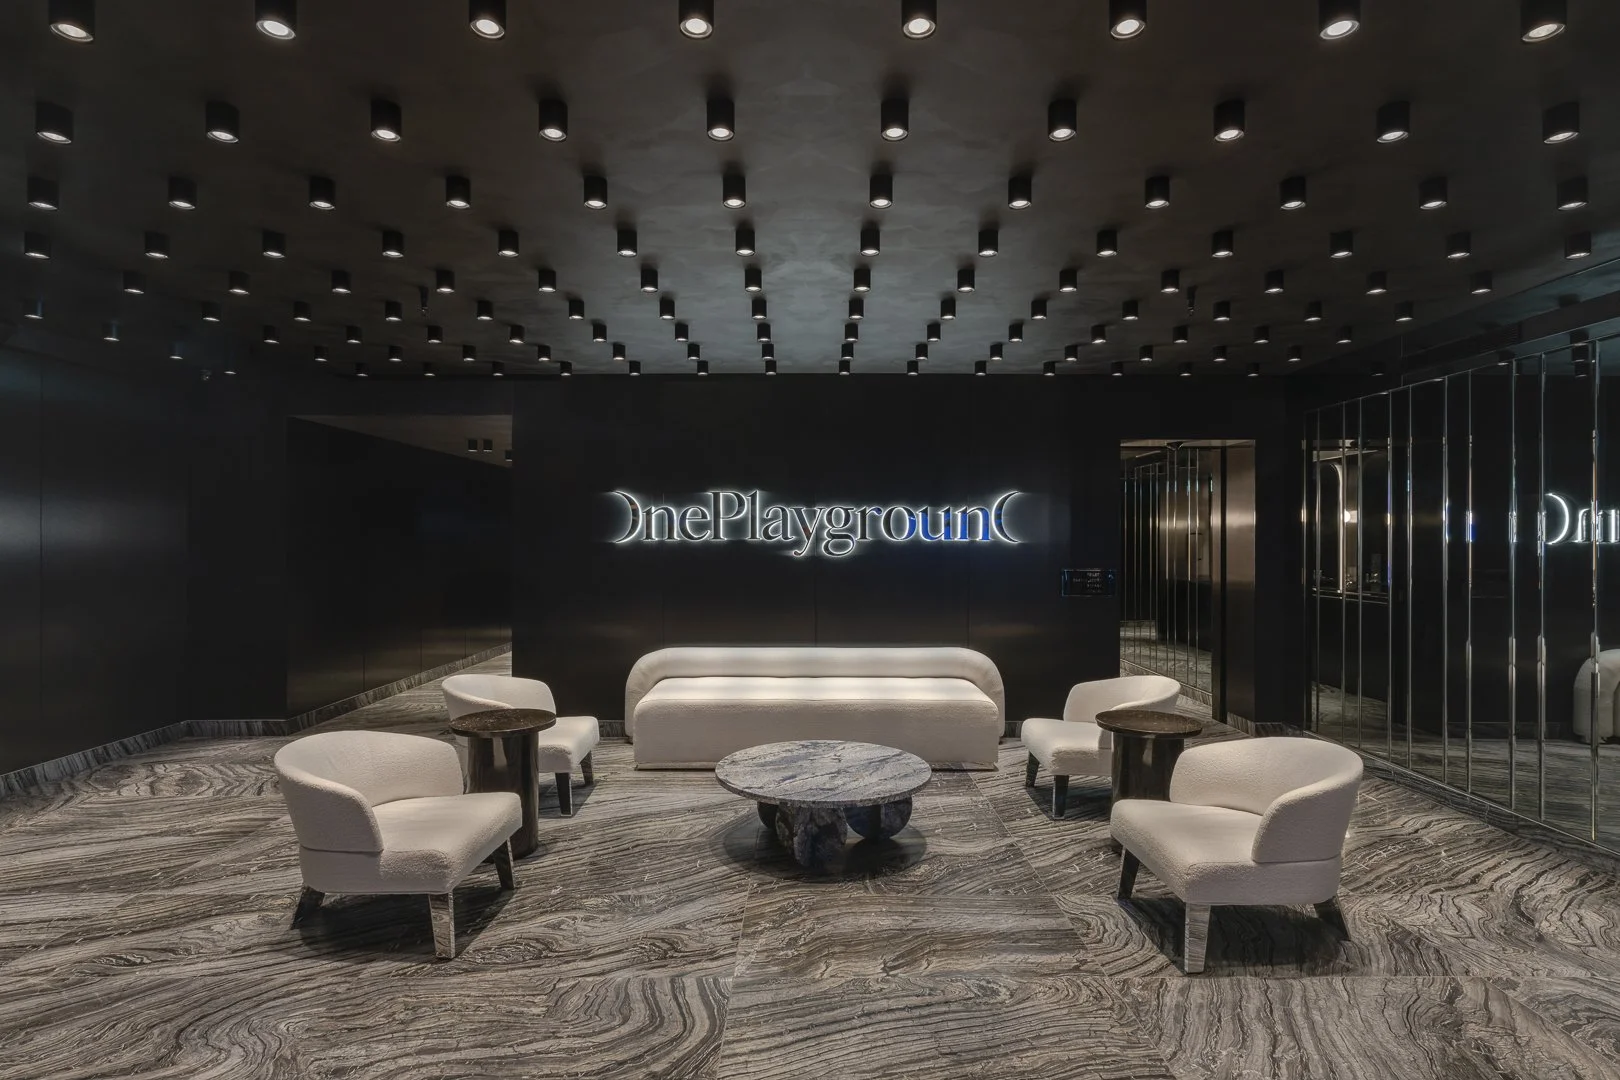
The beautiful thing is that you cannot tell that the final photo had any of the issues seen in the RAW. Nothing looks out of place. The space looks clean and symmetrical, and there’s nothing distracting to the eye. That’s my goal when retouching. Every photo that I submit to a client will be retouched in some way, some more than others.
You can view more photos from One Playground, Haymarket in my Interior Architecture portfolio.